Connect ESP8266 module to Arduino UNO and send data on Ubidots.
In this blog i'll be talking about connection of ESP8266 with ARDUINO (uno). We are using Ubidots cloud service to send our data and view it on dashboard. Firstly you have to make a device on Ubidots which is very easy. Open a new tab in your browser while reading this blog.
You firstly check the video mostly concentrate on the first module which consist of Esp8266 with Arduino and then proceed to read this blog it will be much helpful to you to understand better.
link of the video : https://www.youtube.com/watch?v=X-zqsx5eW8g&t=191s
You firstly check the video mostly concentrate on the first module which consist of Esp8266 with Arduino and then proceed to read this blog it will be much helpful to you to understand better.
link of the video : https://www.youtube.com/watch?v=X-zqsx5eW8g&t=191s
- Login the website ubidots.com .
- Create a Device with desired name.
- Finally make a variable with suitable name.
The important points in this variable is your Variable ID.
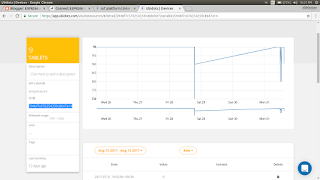
In below image the selected part is the variable Id which is unique for each Variable you create in the Ubidots.
The second important part in this whole process is Token number. Click on the name there will be drop down in that click on Api credentials and you will find you Token number.
NOTE : You will require this Variable ID and Token number in Programming stage.
To communicate with the variable create Ubidots is using various request commands like POST, GET, PUT etc. In this demonstration we are using POST request to update the data from our device. This post request is send using special format which is in JSON format. If you want to explore more about this command just go to the Ubidots docs.
As this blog's topic is regarding ESP8266 now it's time to learn about this module little bit.
Power requirement of ESP8266:
You can connect the WiFi module directly to the Arduino uno. The current sourcing of GPIO (General Purpose Input Output) of arduino is 40 mA. Which is more than enough to drive your WiFi module.
ESP8266 Wi-Fi Module:
Data sheet for this module available on:-
Pinouts of Esp8266:
- VCC - 3.3V supply (3.3V from Arduino).
- CH_PD - 3.3V supply.
- GND - GND (from Arduino).
- Tx - pin 5 of arduino uno.
- Rx - pin 4 of arduino uno.
AT Commands of ESP8266:
AT Commands are the only source to connect this module to the WiFi network, Internet, Ubidots. I will try to explain some of the AT Commands which i have used in the code.
- AT -> This command is the base command to check whether the module is feed with AT firmware or not. If the module is working fine than the response of this command is OK.
- AT+RST -> It is used to reset the Esp module.
- AT+CWJAP -> This command is to connect to the Access Point (wifi modem or Wireless Router). It require your wifi SSID and PASSWORD as an argument.
- AT+CIPSTART -> With the help of this command we can connect our module with any website. The first argument of this command is Type of protocol(UDP or TCP) in our case it is TCP. Second argument is the ip address of the website (you can convert the website domain name into ip address online just copy domain name and they will convert it to the ip address). Last argument is port number as we are using HTTP it will be 80.
Link of Code : https://github.com/CDAC-DESD-project/IOMT.git
The main code you will mostly intersted is funUbidots.ino which is present in the GitHub repository and additional Library SoftwareSerial.
You can download the code and see the data value which is 10 get uploaded on the ubidots for your data to be uploaded you need to make some changes in the code. Believe me it won't be tough :).
Explanation about the code:
In the first line we have included #include<SoftwareSerial.h>. This library is used to convert any two pins as Tx and Rx.
NOW the question arises why the hell we need this?
Ans: As Arduino UNO consist of only one UART which we will be using to communicate with our Serial Monitor. This makes our internal UART Tx(pin 1 of arduino) and Rx(pin 0 of arduino) busy with USB (YES they are sort of internally shorted).
So the we need to connect the ESP8266 Rx and Tx to these pin ie 4 and 5 respectively.


Thank you so much for this worthy information it will really help to given an idea about making connection of wifimodule to cloud ..
ReplyDelete